Measuring temperatures and surface temperatures
In this practical example, the pupils measure the temperatures at different locations. In this way, they observe at close range what influence materials, green spaces, plants and water have on our microclimate. Equipped with infrared measuring devices, different surface temperatures are measured to find out which materials and colours heat up faster than others.
LEARNING GOALS

Pupils can:
- describe their personal perception of temperature.
- carry out, record and evaluate temperature measurements.
- present measurement results in a comprehensible way, e.g., in diagram form.
- explain heat phenomena in the city due to climate change and urban development.
- explain the benefits of vegetation for the microclimate using the example of temperature.
Background Information
Subjects: Biology and Environmental Studies, Physics
Required Materials: clipboards, thermometer, infrared thermometer (or thermal imaging camera), a white and a black piece of cardboard DIN A4 (other materials in black and white can also be used, it is only important that both are made of the same material), worksheets
Required premises/equipment of the rooms: schoolyard and/or school garden
Ideal for: whole class or small group
Time required: approx. 2 teaching units (depending on the number of measuring points & distance)
HINT

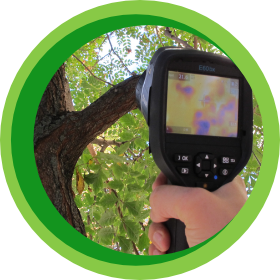
Instead of an infrared measuring device, a thermal imaging camera is also suitable. If neither is available, the temperatures of the different surfaces can also be felt and discussed based on the students’ experiences in summer and winter.
Preparation
Think of typical places where the pupils can see the extreme differences and where there are different surfaces. The following locations are suggested for the measurements: heavily built-up city centre, park and in the immediate vicinity of a flowing body of water. In addition, you are welcome to consider other interesting locations, such as under a tree in the city, in the schoolyard, at a car park, etc. This unit should be done on a sunny day in the warm months.
Tasks in class
- The starting questions for this teaching unit could be: What temperatures are comfortable or healthy for us? Where is the hottest place in the school environment? To what extent do plants contribute to comfortable temperatures?
- The pupils first collect their assumptions and experiences.
- Hand out the worksheets for the students to fill in the data collected and discuss with the students how the measurement should be done and how the results should be recorded.
- Before taking the measurements, the students should estimate the temperature, what is the perceived temperature at the chosen location. They can also add how this temperature is perceived (e.g., pleasant, hot, cold …).
- Afterwards measurements are taken, and the respective data is noted down by the pupils. Follow the instructions for use of the device, as the devices usually take different lengths of time for the measurements.First, temperatures are measured at different locations.
- First, temperatures are measured at different locations.
- Then measuring of the materials is taken. Place the prepared white and black material in the sun for about 20 to 30 minutes. Then let the students measure or feel both surfaces. In the meantime, the students should test as many different materials as possible, e.g., wood, concrete, asphalt, metal, open ground and also different colours. For comparable results, try to always take the measurements of the materials in the sun.
- After all measurements have been completed, compile them in the classroom. You can write down the individual measurements on the board or on a flip chart.
- Discuss the results with the pupils. Questions could be, for example:
- Where were the highest values measured? Where were the lowest? What characteristics distinguish these locations?
- What influence does vegetation have on the measured values? What influence do sealed surfaces have?
- For which materials were the highest and lowest values measured?
- What are the temperature differences for the same materials in different colours?
- How and with what measures could the temperatures in the city be lowered?
- Which materials are best suited for buildings in terms of temperature?
- What is the benefit of using light colours for buildings and surfaces?
- What else could contribute to cooling of buildings?
- The students use the questions and protocols to derive ideas for planning open spaces, city neighbourhoods and buildings.
- If there is a need: Develop ideas with your pupils on how to turn heat islands in the schoolyard or around the school into green oases.
HINT
The pupils can evaluate and present the results in groups. For this purpose, the data can be sorted according to locations, and materials and diagrams can be created. The results can be presented on posters.
