Climbing plants at school
With the help of this exercise, the pupils can observe and learn about plant growth and the climbing organs of climbing plants at close quarters. For this purpose, they also grow their own climbing plants.
LEARNING GOALS

Students will be able to:
- identify suitable plants for school greening under given site conditions.
- carry out a plant cultivation experiment according to the instructions.
- observe, document and compare the development of climbing plants.
- contribute and implement their own ideas for the design of their school.
- take responsibility for their own project over a period of several weeks.
Background Information
Subjects: Biology and Environmental Studies, Handicrafts, Technical and Artistic Education
Required Materials: pots, potting soil, trellises for the potted plants, gloves or small shovels for planting; plants, seeds or cuttings from existing plants. For observation: digital camera, tape measure, felt tip pen
Required premises/equipment of the rooms: schoolyard or classroom
Ideal for: large group
Time required: approx. 2 teaching units, plus observation over the entire growth period of the plants
Preparation
You can plant different forms of climbing plants in pots in the schoolyard or in the classroom. You can either buy plants or use cuttings from existing plants or plant seeds to grow your own climbing plants.
- Select one or more suitable locations for the plants in advance.
- Check with the appropriate office at the school.
- Consider the care of the plants throughout the period.
- Obtain seeds, cuttings and the materials needed.
- Pots can be designed in advance in class. Simple climbing supports can be built and designed in handicraft or art classes.
HINT

Find a suitable time period for this lesson! If you want to work with annual plants, you should start as early as March (in the classroom) so that the plants are fully grown by summer vacation. If you want to propagate and use perennial plants, you will need to secure care during summer vacation. In this case, too, it makes sense to start in early spring so that the plants have developed sufficient roots by summer.
HINT
- Suitable cuttings are, for example, at least 15 cm long shoots of clematis (Clematis spp.) or pipevine (Aristolochia macrophylla) or one year old shoots with at least 4 buds of wild vine (Vitis vinifera spp. sylvestris). Often this plant material is a “waste product” from plant pruning. Ask in class, your colleagues or at the local gardeners if this can be provided free of charge.
- Clematis and wild wine can also be propagated using the lowering method (propagation by layers). In this case, the offshoot is only separated from the mother plant when it has formed sufficient roots of its own.
- Cucumbers, peas and beans (e.g., runner beans) are an example of stem tendril climbers and grown from seed.
Tasks in class
- Visit the location with the students. If there are several possible locations, you can choose the ideal location together, where the plants can be observed regularly.
- Discuss with the students the site conditions (light conditions, soil, climbing possibilities, desired growth height) and suitable plants for this site.
- Optional: Have the students gather information about climbing plants, create plant profiles and present them. Place an emphasis on the different climbing organs. Then decide together which of the plants are suitable and will be chosen.
- Using plant seeds: Fill the pots with soil and place the seeds approx. 2 cm into the soil. Keep the soil moist until the seeds have germinated. After germination you can place the trellis or climbing aid into the pot.
Using plants: Repot the plants together in larger pots and put the trellis in the soil behind the plant. - The plants can now be placed in their chosen locations indoors or outdoors and the observation begins.
- To observe the growth of the plant, weekly reporting can be done. The plant should be photographed, and its length measured. To observe how much the plant grows in a week, the highest point of the plant can be marked on the trellis (with a felt-tip pen or coloured tape, make a note of the date). Each week, note how many centimetres the plant has grown (in the case of a large plant that is already older, individual shoots can be observed). Take a closer look at the newly formed leaves and climbing organs and photograph them.
- Optional: After the plant has developed climbing organs, have the pupils draw them and go through the different forms of climbing plants together. How do they differ?
- Towards the end of the school year, discuss the observations. Focus on the initial questions: Which plants are suitable for greening our school? How can these be grown yourself? What propagation techniques were chosen? How and where can the grown climbing plants be used? By how much did the plants grow during the observation period? How are the plants holding on? How have the leaves changed? (For example, do they turn toward the sun?). In which direction does the plant grow?
HINT
- Use sufficiently large pots with holes and pot saucers or planters.
- Work with your students to create a time-lapse video or photo collage of plant growth. There are simple apps for smartphones for time-lapse videos.
- You can also create diagrams of the growth height of plants as a function of time.
DID YOU KNOW?

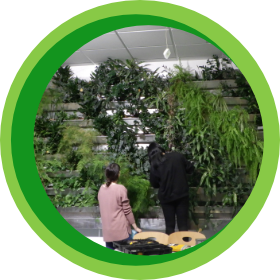
Vertical greening in a school can be implemented as a small or large project. The following examples will illustrate this.
- Small project: Use of simple, degradable climbing aids such as sticks. Set up planters for annual climbing plants such as sweet peas, runner beans, or cucumbers (grown from seed) or for perennial climbers (propagation with cuttings). Perennial climbers can be used the following year for a medium or large project.
- Medium project: Greening of small objects such as a fence, light pole or pergola with annual or perennial climbers such as clematis or climbing roses. Check the growth height!
- Large project: greening a building with perennial climbers or using plant mats or troughs (further information is here). A large project requires advance planning, clarification with the school administration and school board, and professionals for implementation.