Greening up your classroom
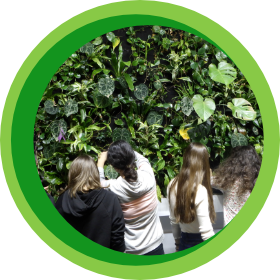
In this exercise, the classroom is to be greened and enhanced by numerous plants. The plants are chosen together, placed in the class, planted and cared for.
LEARNING GOALS

Pupils will be able to:
- develop ideas for interior design
- state the needs and growth requirements of the plants and apply to those plants in the classroom
- carefully repot and care for the plants
- take responsibility for the care of living plants
- experience and reflect on the design of their own living environment
Background Information
Subjects: Biology and Environmental Studies, Handicrafts, Technical and Artistic Education
Required Materials: flowerpots, potting soil, different plants, gloves, small shovels for planting, screwdriver, electric drill
Required premises/equipment of the rooms: classroom or schoolyard
Ideal for: large group or small groups
Time required: approx. 2 – 3 teaching units
Preparation
Depending on the weather and planting needs, the pots can be planted either in the classroom or in the schoolyard. Ideally, work in small groups of two to three students per group.
- Think ahead about the possibilities the classroom or an alternative space in the school offers for greening. Discuss your intentions with the school management.
- Make a list of what materials are available in the school and what needs to be purchased and make an approximate calculation of the costs. Consider local sources of supply and suitable potting soil without peat or an alternative substrate.
- Plants: Use plants from the exercise “Growing your own young plants” (plant care) or ask the pupils to bring cuttings of houseplants from home, or even plants that no longer have room at home.
- When buying pots, make sure that they have holes to prevent waterlogging, and a planter or saucer in which excess water can be collected. The advantage of a saucer is that you can see immediately when watering that the plant has too much water.
Tasks in class
- As an introduction, the following initial questions can be discussed: Do we do better in a green classroom? How can we design a green classroom? Which plants are suitable? What conditions do they need to grow well? How can we proceed?
- Start by selecting together one or more suitable places for the plants. The windowsill should be avoided as a location, as the windows for ventilating the classrooms can otherwise only be opened to a limited extent.
- Optional: Pupils develop ideas and make plans for greening the classroom and the placement of plants. Plant shelves and hanging plant pots offer extra possibilities. The plants and their procurement can also be discussed ahead of time. The pupils justify their ideas, considering the needs of the plants, the design of the room and other aspects such as freedom of movement in the room.
- Once all the materials are available and the planting can begin, the next step is to determine which plants go into which pots. Each group takes a plant and a suitable pot.
- Now the plants are transplanted into appropriate pots using the potting soil. The soil can be pressed down a little at the end and sufficiently watered.
- Arrange the plants in the classroom according to the previous considerations.
- Now a care plan should be drawn up. Each pupil should be assigned to water the plants on a weekly basis in a rotating order. The care and observation of the development of the plants can be included in the biology lessons.
- Towards the end of the school year, the activity is evaluated with regards to the initial questions: How well did the plants grow? If some plants are doing less well: Which of their growing conditions are not being met? What could be changed? How do the class and other pupils and teachers like the green classroom? Has well-being improved? How do the pupils rate the results and experiences of the action?
HINT

- When repotting, it is important that the root ball is completely covered with soil and well-watered. However, the stem or trunk of the plant should not be covered with soil. Take care not to damage the roots when repotting and do not plant the plant too deep in the pot. Ideally, the soil should reach to about three centimetres below the edge of the pot and the plant should be planted accordingly.
- Plants that are placed on the floor can be equipped with a plant caddy on wheels, so you make the cleaners’ work easier and enable them to move the plants quickly and easily.
- The pots can be designed, painted and pasted in handicraft or art education classes. It is also possible to make fixtures for hanging plants or to build shelves and caddies with wheels.