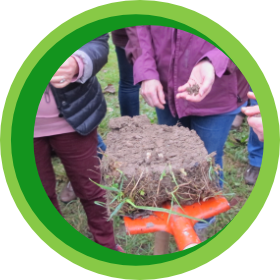
Soil analysis

The pupils learn about different types of soil and their composition by means of the finger roll test. To which soil type does the soil in the school garden, in the home garden or in the field belong? How can you distinguish between the different types of soil? The slurry sample provides additional information about the composition of the soil.
LEARNING GOALS

Pupils can:
- name soil types and their properties
- state the ideal type of a horizontal structure of soil
- explain the presence of soil horizons with the formation of soil
- carry out soil analysis according to instructions and record the results
- assess some properties of the examined soils that are relevant for plants
- Deduce meaningful conclusions and measures for the greening of the school grounds.
Background Information
Subjects: Biology and Environmental Studies, Chemistry, Physics
Required Materials: Spade (or hand shovel), different types of soil, container for soil samples, spray bottle (filled with water), an additional container for slurry sample: Petri dishes or other flat dishes, stopwatch
Required premises/equipment of the rooms: ideal for school gardens
Ideal for: small groups
Time required: approx. 1 teaching unit
Preparation
It is ideal to test at least three different soil samples. It is sufficient to collect a small amount, for example to fill an approx. 0.5 l container each. The soil samples are taken from a depth of approx. 20 – 40 cm. You can also collect the soil samples together with the pupils: from the school garden or on a hiking day, or have the pupils bring them from home.
- Place the soil samples in different containers.
- Label the containers.
- Make sure the pupils record where on the site, trail or at home the soil samples were taken.
HINT

The soil samples should be as fresh as possible. They should be neither too dry nor too wet, but soil moist.
Ideally this experiment is undertaken in late spring, summertime, or early autumn.
Tasks in class
- Introduce the experiment by reminding them of what they have already learned: What soil types do you know? Which soil types are predominant in our region?
The starting questions for the lesson could be: What soil types can be found on the school grounds? Do these soil types offer plants rather good or bad conditions? What conclusions can be drawn from this for the greening of the school grounds? - At the beginning of the exercise, identify a sample of soil together to demonstrate the procedure to the pupils.
- Rolling sample: For the finger roll sample: try to roll the slightly moistened soil between the palms of the hands into a sausage (pencil thickness).
- Pencil-thick roll which is not mouldable: If no roll is mouldable, it is a sandy soil. Fine soil components left behind in the creases of the hand indicate clayey material and thus loamy sand. If no clay is visible in lines of the hand, it is a sandy soil.
- Pencil-thick roll which is mouldable: A crunching sound between thumb and index finger near the ear when squeezing and rubbing indicates sandy loam. If no crunching is perceptible and the surface is dull when the soil sample is squeezed, it is loam. If the sliding surface is shiny, it is clay. Pure clay has a buttery consistency.
- The pupils determine the soil samples and document the results.
- Discuss the results with the pupils. Explain that plants need soil that contains air, nutrients and water, the amount depends on the type of plant.
- How well can the analysed soil store or absorb water?
- Can plants root through this soil easily or with difficulty?
- Does this soil silt easily?
- Is this soil easy to compact?
- How well is the soil aerated?
- What are the consequences for the greening of the school grounds? (e.g. soil improvement with compost would be useful, or is not necessary; regular watering will probably be necessary; the soil should be loosened, …)
HINT

Slurry method
In addition, a slurry sample can also be carried out. This allows the soil crumb composition to be determined. Let the soil samples dry well before the lesson. Petri dishes or similar dishes and a watch are needed for this method, which can be carried out in the classroom or laboratory.
- The pupils fill the petri dishes to two-thirds with water.
- One third of a teaspoon of each soil sample is put into a different petri dish.
- The dishes should be labelled, so that the pupils do not forget which soil sample they have put into which petri dish.
- The pupils observe how the soil samples behave. After waiting five minutes, the petri dishes are carefully swirled.
- Students note or present to the class what they see and make comparisons between the soil samples.
Do the crumbs break down? If so, how much? Are the crumbs different sizes? Does the water become cloudy or remain clear? Do the soil crumbs dissolve or stick together?
Results: clear water, the soil crumbs fill with water but do not disintegrate. In turbid water, the soil crumbs dissolve easily, they are unstable.
DID YOU KNOW?

Fertile soils are well populated with soil organisms, crumbly, loose and permeable to air. Earthworms improve soil quality by excreting soil crumbs as faeces. Soil crumbs consist of humus and clay that are cemented together. This happens in the earthworm’s gut, where the various soil particles combine to form resistant crumbs. When it rains, soil crumbs fill up with water like a sponge, which they then slowly release back into the soil. Therefore, soil crumbs are important water reservoirs. If the crumbs dissolve easily in water, they are not well cemented by the soil organisms. In addition, soil organisms mix, loosen and aerate the soil by digging tunnels. Good living conditions for soil organisms are an essential prerequisite for healthy soil.
