Grasscycling
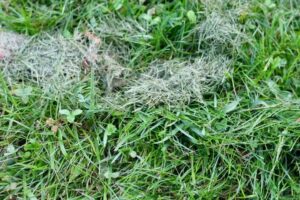
Grasscycling is the natural recycling of grass by leaving grass clippings on the lawn when mowing. Once on the ground, the clippings, which contain 80-85% water, decompose quickly returning valuable nutrients like nitrogen back into the soil. Grasscycling should be used as one piece of an integral lawn management system which also includes thatching, aerating, cutting, watering and fertilising.

BACKGROUND INFORMATION

- SUBJECTS: Science, Geography, Social Personal Health Education, Mathematics, Literacy
- IDEAL FOR: Schools with large grassy areas or sports fields, a Green School initiative in collaboration with caretaker/grounds person.
- TIME REQUIRED:
– Initial setup: 30 minutes (to explain the concept and prepare the lawn)
– Activity: Ongoing throughout the year (after each lawn mowing session)
– Follow-up discussion: 30 minutes per term to review progress and discuss environmental impact
REQUIRED MATERIALS

Grasscycling does not require the purchase of a special “mulching” or “recycling” lawn mower, although these do work better, especially in wet conditions or with tall grass. The most important thing is to keep the blades of your mower sharp – do this at the start of spring each year.
Almost all mowers can be used or adapted to grasscycle, the main types:
- Rotary mowers: remove the grass catching bag and cover the outlet spot (outlet covers are available from most manufacturers).
- Special mulching blades designed to chop cuttings into tiny pieces and blow them into the lawn can be retrofitted to many mowers.
- Reel-type mowers, including manual “push” mowers, can be used by simply removing the catcher.
Preparation
- Choose a suitable lawn area in the school grounds where grasscycling will be implemented
- Ensure the lawn mower is in good condition and set to the correct height (ideally 2.5 to 4 cm)
- Inform students and staff about the project and its environmental benefits.
- Create a progress chart to track the benefits over time (e.g., reduced need for fertiliser, improved soil health)
In Class Tasks
Step 1: Mow the Lawn
- Mow the selected grassy area as usual
- If your lawn mower has a mulching feature, use it to finely chop the grass clippings
- If not, use a rake to spread the clippings evenly across the lawn
Step 2: Leave the Grass Clippings in Place
- Instead of collecting the clippings, leave them on the lawn to decompose naturally
- Ensure the clippings are spread thinly and evenly to avoid clumping
Step 3: Monitor the Lawn
- Over time, observe the health and growth of the lawn
- Track changes in soil quality and grass growth using a logbook or chart
Step 4: Discuss the Environmental Benefits
- Hold regular discussions with students about the impact of grasscycling
- Encourage students to think about ways to reduce other types of garden waste
TIP

Don’t overwater the lawn!
Grasscycling works best on a well-maintained lawn that isn’t overwatered. Overwatering can cause grass clippings to clump and slow down the decomposition process.
A good experiment might be to divide an area in two. Practice grasscycling on one section and a conventional mowing regime on the other, and compare results over time in terms of how healthy the grass looks and how much time is spent cutting each section and how much time is needed to dispose of the grass cuttings from the conventionally mown section.